Assembly of the MT3 PI-REPEATER-2X System
This assembly can be a little intimidating if you are unfamiliar with the process. This guide will help you to either put it together initially, or to reassemble it if you have had to break it down for some reason.
Step 1 – Install the M2.5 bolts through the bottom of the board and install the shorter M2.5 stand-offs to hold them in place
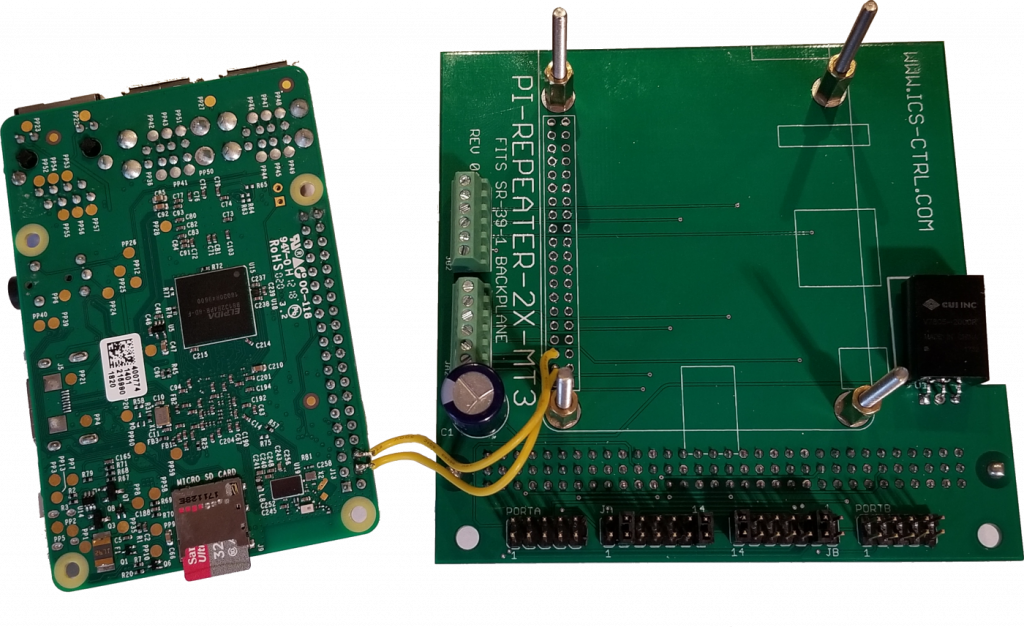
Step 2 – Connect 2 wires via soldering between the carrier board and the Raspberry Pi 3 computer board.
Step 2A – Pin 4 to Pin 4, this is the +5V supply being output from the 12V to 5V regulator
Step 2B – Pin 6 to pin 6, this is the ground signal.
Step 3 – Install the Raspberry Pi 3 onto the bolts following the orientation in the silk screen of the carrier board. It is assumed you have already installed the microSD card to the Pi 3 here. If you haven’t already done this, do it now.
Tuck the soldered wires under the Pi 3 to keep it looking clean and prevent accidental snags.
Step 4 – Add the tall M2.5 Spacers to hold down the Raspberry Pi board.
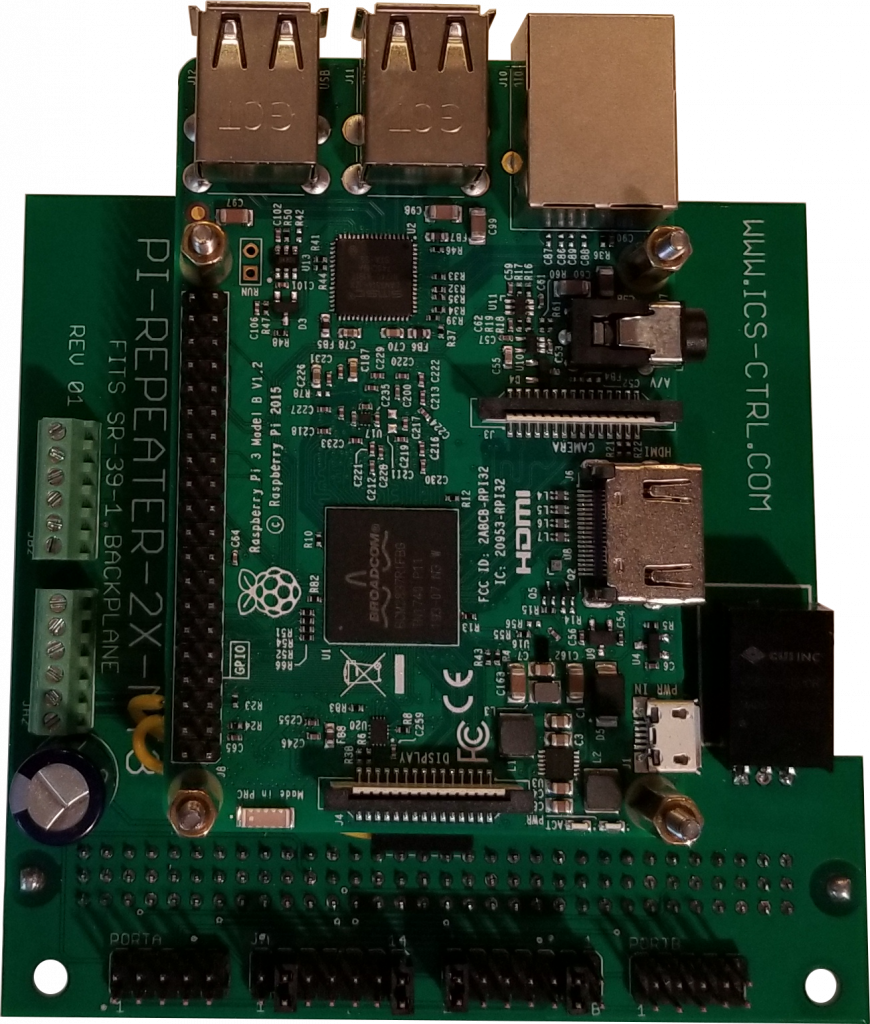
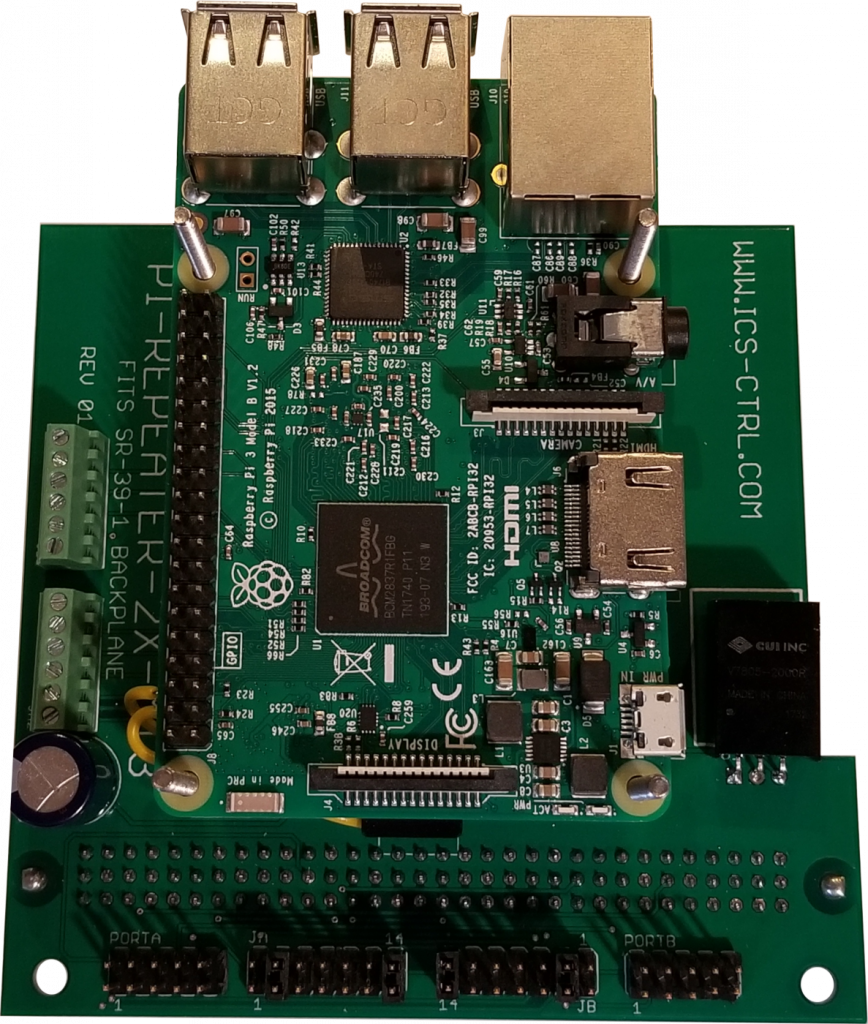
STEP 5 – Install the PI-REPEATER-2X interface Board onto the stand-offs and connect up the 40 pin connectors
STEP 6 – Install the M2.5 Nuts to hold the PI-REPEATER-2X to the assembly
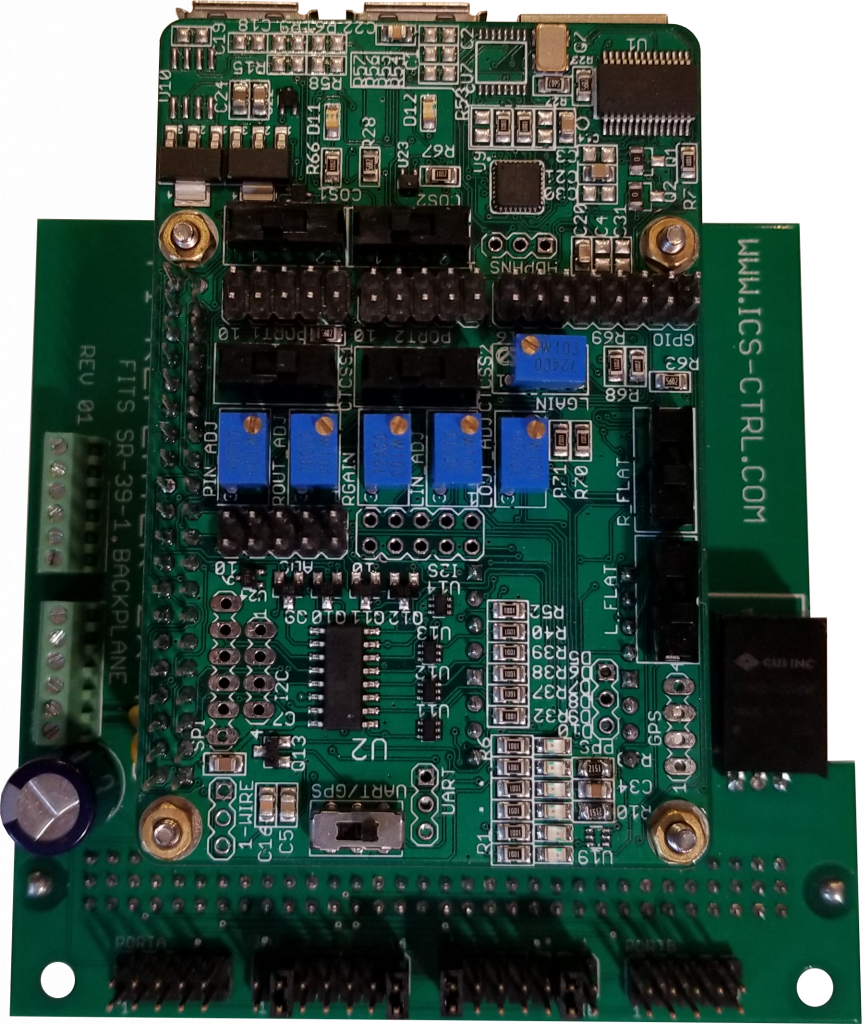
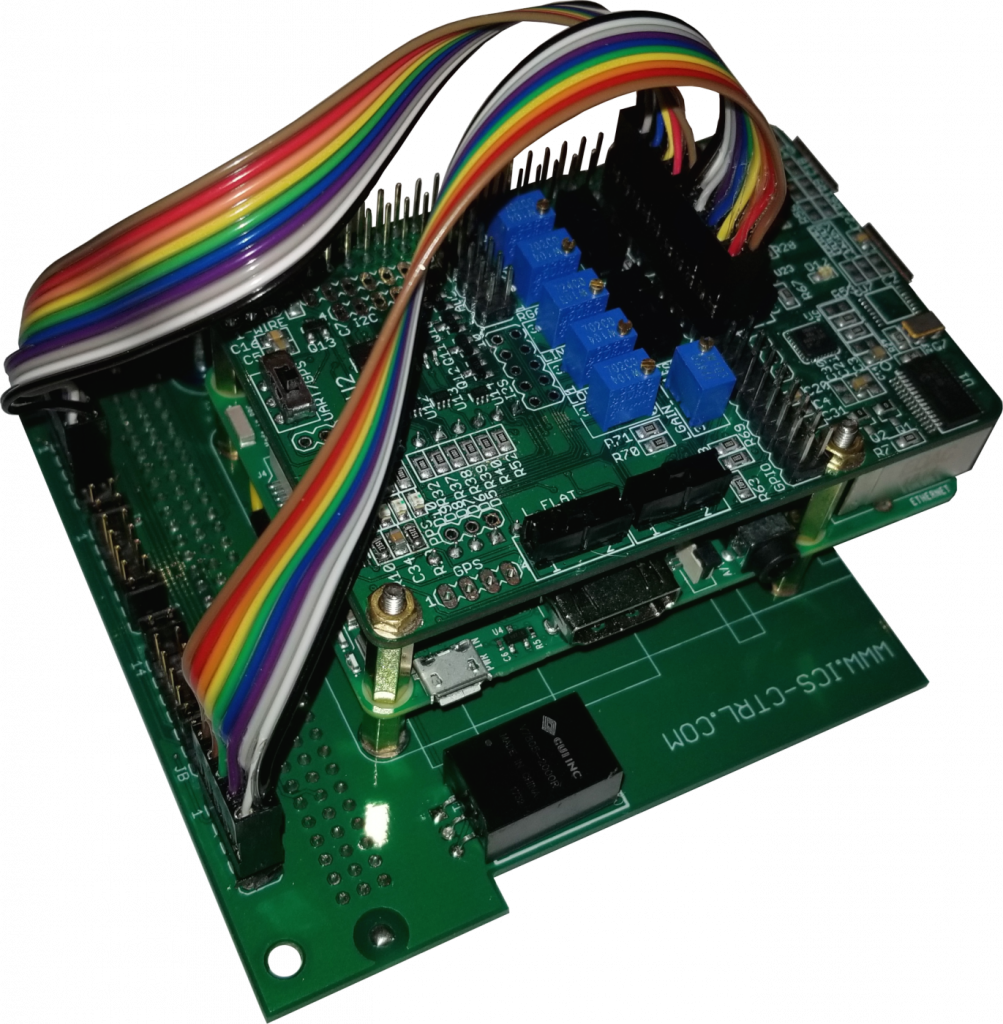
STEP 7 – Install the Port 1 Interface Cable
Install the jumper cable as shown, noting that the brown color is pin-1 and the black color is pin 10.
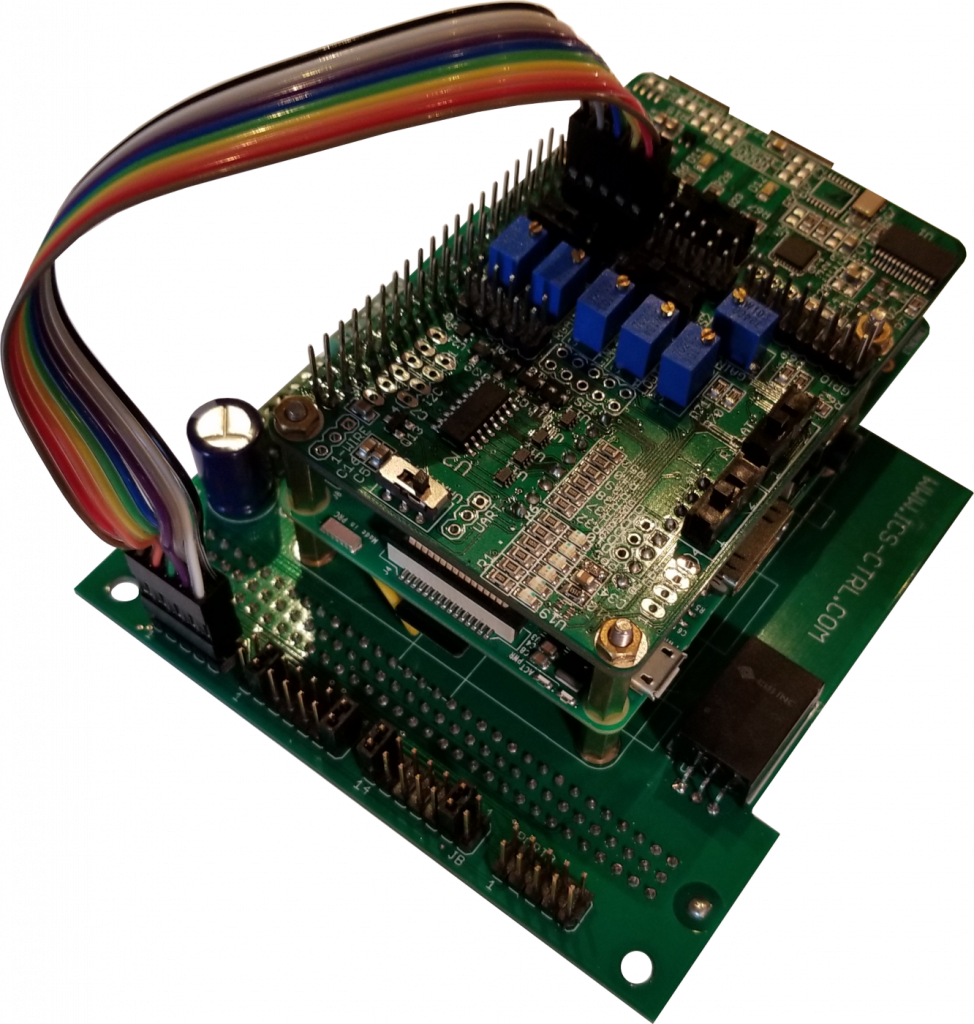
STEP 8 – Install the Port 2 Interface Cable
Depending on how you have your chassis setup, you may need to use the second jumper cable or alternatively use a DB9 hook-up cable to link to a radio that is outside the chassis.
Here will be shown the 2nd jumper cable option to demonstrate the cable orientation. If using the DSUB-9 interface cable, the orientation will be the same on the PI-REPEATER-2X interface board.